
 There are three main ways to waterproof a basement: seal the inside of the walls and floor with a coating, install an interior drain and sump pump that collects water after it gets in, or dig outside and apply a membrane to the outside of the foundation. Interior coatings cost the least and stop water at the concrete. Interior drains manage water instead of stopping it. Exterior membranes work well on new construction but are the most expensive and disruptive option on an existing home. This page compares all of them side by side, along with crack injection, masonry paint, and outside drainage fixes.
Start by finding where the water comes in
The right method depends on the source. Water that shows up at the base of the walls after storms usually comes through the floor-wall joint. Damp patches and white efflorescence mean water is moving through the concrete itself. A single wet crack in a poured wall is a crack problem. Condensation on the walls in summer is a humidity problem and needs a dehumidifier. Tape a 2 ft square of plastic to the wall for two or three days: moisture on the wall side means seepage, moisture on the room side means condensation. What causes leaky basements walks through every source.
Option 1: Interior waterproofing coatings
A coating is applied to the inside face of the walls and, when needed, the floor. The type of coating matters more than anything else.
Masonry waterproofing paint (DRYLOK and similar) is the cheapest and easiest. It reduces light dampness. It sits mostly on the surface, so when water pushes from the soil side it tends to blister and peel, and it does not bridge cracks. See SANI-TRED vs. DRYLOK.
Cement-based and crystalline coatings bond to clean masonry and resist some pressure, but they are rigid and crack when the wall moves.
Penetrating liquid rubber coatings soak into the concrete pores and cure into a flexible rubber membrane. Used as a system with a thick patch for cracks and the floor-wall joint, they seal the whole surface and hold back water under hydrostatic pressure.
- Pros: lowest cost, no digging, DIY friendly, stops water and vapor at the wall, you can see and repair every inch, leaves walls dry enough to finish
- Cons: old paint and coatings must be removed first; walls have to be dry when coated; cheap masonry paints fail under pressure
- Best for: seepage through walls and floors, floor-wall joint leaks, damp walls, basements you plan to finish
Full steps are in how to waterproof basement walls from the inside.
Option 2: Interior drain tile and sump pump
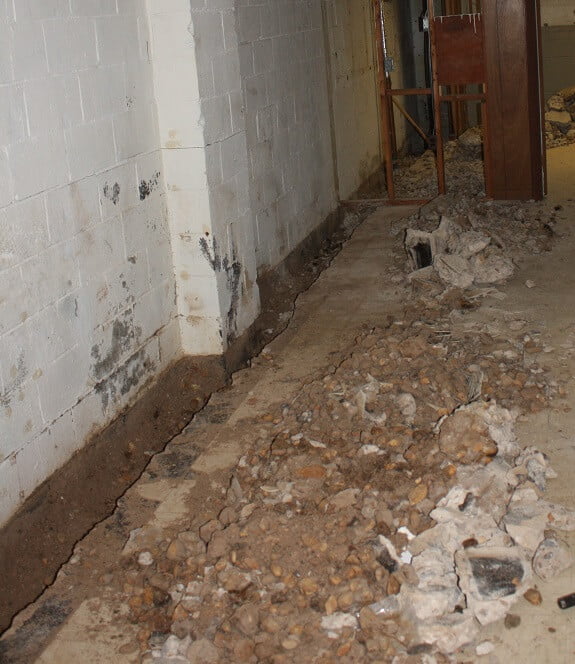
A crew cuts a trench in the slab around the inside perimeter, often 12 inches wide or more, lays perforated pipe in gravel, and runs it to a sump pit. Plastic sheeting or panels on the walls direct seepage down into the trench. A pump lifts the water out of the house.
- Pros: handles large volumes of water and high water tables; relieves pressure under the slab; installed in a few days by a contractor
- Cons: water still comes through the walls; humidity stays high, so a dehumidifier is usually part of the package; the pump needs power during storms and a battery backup for outages; jackhammering the floor is loud and messy; pumps wear out and need replacing
- Best for: homes with a high water table or recurring flooding where water comes up through the slab in volume
More detail in the pros and cons of an interior footing drain and the pros and cons of sump pumps.
Option 3: Exterior excavation and membrane
The soil is dug out down to the footing, often 6 to 8 feet deep. The outside of the wall is cleaned and repaired, a waterproof membrane is applied (sheet membrane, rubberized asphalt, or a liquid-applied coating), and drainage board and a new footing drain usually go in before backfill.
- Pros: keeps water off the wall entirely; can be combined with a new footing drain; standard practice on new construction
- Cons: the most expensive option on an existing home; destroys landscaping, walks, and sometimes decks or driveways; hard or impossible next to an attached garage or a close neighbor; a tear or bad seam is buried where no one can find it
- Best for: new construction, or a wall that already has to be excavated for structural repair
Many older homes only have dampproofing, a thin asphalt spray, on the outside. Building codes treat that as a moisture retarder for well-drained soil, not as waterproofing.
Other fixes you will hear about
Crack injection
Epoxy or polyurethane is injected into a crack in a poured concrete wall to fill it through the full thickness. It works well for a few isolated cracks. It is not a fit for block, brick, or stone walls, and it does nothing for water coming through the rest of the wall or the floor-wall joint. See basement crack repair options.
Bentonite clay
Bentonite swells when wet and forms a barrier. It is injected or packed around the outside of the foundation, or installed as panels. It works only when it stays confined and wet, and it can wash out or dry and shrink over time.
Outside drainage fixes
Clean gutters, downspout extensions of 4 to 6 feet, and soil sloped away from the house are cheap and should come first with any method. They lower the amount of water pressing on the walls. They will not stop water that is already in saturated soil or coming up from a high water table.
Cost comparison
Prices vary a lot by region, the size of the basement, and how bad the water problem is. Typical national ranges from contractor cost guides:
- Masonry waterproofing paint (DIY): roughly $100 to $500 in materials for a typical basement
- Penetrating liquid rubber system (DIY): depends on wall area and crack length; use the basement waterproofing cost calculator for an exact materials list
- Crack injection (contractor): about $300 to $1,000 per crack
- Sump pump installation: about $600 to $2,000
- Interior drain tile and sump (contractor): about $40 to $100 per linear foot, often $5,000 to $15,000 for a full perimeter
- Exterior excavation and membrane (contractor): about $100 to $300 or more per linear foot, often $10,000 to $30,000 or more for a whole house
For a full breakdown of DIY and contractor pricing, read basement waterproofing costs.
Common myths
- “Any waterproofing paint will fix a wet basement.” Paint that sits on the surface fails when water pushes from behind.
- “A sump pump waterproofs the basement.” A pump removes water that already got in. The walls and air stay damp.
- “Only exterior waterproofing works.” An interior coating that bonds into the concrete holds water back from the inside, and you can reach it to inspect or repair it.
- “New homes don’t leak.” Concrete shrinks and cracks as it cures, and new backfill settles and changes the grade. Leaks in the first few years are common.
How to choose
- Damp walls, efflorescence, or seepage at cracks and the floor-wall joint: interior liquid rubber coating
- A few cracks in a poured wall, otherwise dry: crack injection or a rubber patch, then consider coating
- Water pouring up through the slab or a very high water table: interior drain and sump, and seal the walls so they stay dry
- New construction or a wall that must be dug out anyway: exterior membrane and footing drain
- Musty air and condensation only: dehumidifier and better ventilation
In every case, fix gutters, downspouts, and grading first.
Seal your basement from the inside with SANI-TRED
SANI-TRED is a DIY liquid rubber system that bonds into concrete and cures into a seamless rubber membrane. It works on poured concrete, block, brick and mortar, and stone and mortar. The process is prep, prime, patch, and topcoat: PermaFlex for the prime coat and topcoat, and a mix of two parts LRB to one part TAV for cracks and the floor-wall joint. It holds back water under hydrostatic pressure and blocks 99 percent of radon gas. The products are solvent free, non-flammable, and low VOC, and they carry a lifetime warranty.
- See the basement waterproofing system
- Compare products in the basement waterproofing products buyer’s guide
- Price your basement with the cost calculator
- Call 1-866-784-3308 to ask a SANI-TRED tech which approach fits your basement
Frequently asked questions
Is interior or exterior basement waterproofing better?
Exterior waterproofing is standard on new construction. On an existing home, an interior coating that bonds into the concrete costs far less, needs no digging, and can be inspected and repaired. Interior drains are a third choice for very wet sites.
What is the cheapest way to waterproof a basement?
Fix gutters, downspouts, and grading first, since they cost little. After that, an interior coating you apply yourself is the least expensive way to seal the walls and floor.
Do I need a French drain or just a sealant?
If water seeps through the walls, cracks, or floor-wall joint, sealing the concrete stops it at the source. A drain makes sense when large volumes of water come up through the slab from a high water table.
Does crack injection waterproof the whole basement?
No. It seals the crack it fills. Water can still come through the rest of the wall, the floor-wall joint, and the concrete pores.
How long does basement waterproofing last?
It depends on the method. Masonry paints often need recoating within a few years. Sump pumps typically need replacing every 7 to 10 years. SANI-TRED, properly applied, carries a lifetime warranty.
Sources: International Residential Code, Section R406; cost ranges from national contractor cost guides (HomeAdvisor and Angi), which vary by region.